EGR Valve Replacement Guide: How to Replace and Install an EGR Valve
Introduction
An Exhaust Gas Recirculation (EGR) valve is an important component of modern automotive emission control systems. It regulates the flow of exhaust gas back into the engine intake to help reduce combustion temperatures and nitrogen oxide (NOx) emissions.
Over time, an EGR valve may develop problems caused by carbon buildup, mechanical wear, actuator failure or electrical malfunctions. When cleaning or repairing the component cannot restore proper operation, replacing the EGR valve may be necessary.
This EGR Valve Replacement Guide explains when an EGR valve should be replaced, how to prepare for the replacement, the installation process, common mistakes to avoid and how to select a suitable aftermarket EGR valve.
Whether you are an automotive technician, repair workshop, parts distributor or vehicle owner, understanding the correct EGR valve replacement procedure can help improve repair quality and reduce unnecessary costs.
1. When Should You Replace an EGR Valve?
Not every EGR-related fault code means that the EGR valve needs replacement.
Before installing a new component, technicians should identify the actual cause of the problem.
Common signs that an EGR valve may require replacement include:
1),Check Engine Light
An illuminated check engine light may indicate an EGR system malfunction.
Common diagnostic trouble codes include:
●P0401 – EGR Insufficient Flow
●P0402 – EGR Excessive Flow
●P0403 – EGR Control Circuit Malfunction
●P0404 – EGR Range / Performance
These codes require further diagnosis and do not automatically confirm an EGR valve failure.
2),Rough Idle or Engine Stalling
An EGR valve that cannot close correctly may allow excessive exhaust gas into the intake during operating conditions when EGR flow should be limited.
This may cause unstable engine operation or stalling.
3),Reduced Engine Performance
An EGR valve that fails to operate correctly may affect engine performance, depending on the engine design and operating conditions.
4),EGR Valve Stuck Open or Closed
A valve that remains mechanically stuck or cannot respond to ECU commands may require cleaning, repair or replacement.
5),Failed Functional Testing
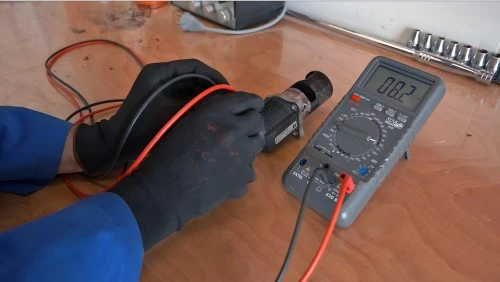
If the valve fails appropriate functional tests and the underlying electrical, mechanical or system-related causes have been ruled out, replacement may be necessary.
2. Tools and Materials Required for EGR Valve Replacement
Before beginning the replacement, prepare the necessary tools and materials.
Common requirements include:
●Socket and wrench set
●Screwdrivers
●Torque wrench
●Diagnostic scanner
●Appropriate cleaning tools
●New EGR valve
●New EGR gasket or seals
●Protective gloves and safety glasses
●Vehicle-specific service information
●Additional tools may be required depending on the vehicle model and EGR system design.
●Always follow the vehicle manufacturer's service instructions.
3. Step-by-Step EGR Valve Replacement Guide
The following procedure provides a general replacement overview. Actual steps, access requirements and installation specifications vary between vehicle applications.
Step 1: Identify the Correct EGR Valve
Before removing the old component, confirm the replacement part is suitable for the vehicle.
Check:
●Vehicle make and model
●Model year
●Engine type and displacement
●Fuel type
●OE reference number
●Electrical connector configuration
●Mounting dimensions and port arrangement
●Correct application matching is essential for proper installation and operation.
Step 2: Prepare the Vehicle
●Park the vehicle on a level surface and allow the engine and exhaust system to cool completely.
●Switch off the ignition and disconnect the battery according to the manufacturer's service instructions.
●Follow the appropriate safety procedures before working on electrical components or the exhaust system.
Step 3: Locate the EGR Valve
●Refer to the vehicle service manual to identify the EGR valve location.
●Depending on the engine design, the valve may be installed near the intake manifold, exhaust manifold or connected EGR pipe.
●Remove any components that obstruct access, following the manufacturer's procedure.
Step 4: Disconnect Electrical or Vacuum Connections
●For electronically controlled EGR valves, carefully disconnect the electrical connector.
●For vacuum-operated systems, identify and disconnect the relevant vacuum hoses.
●Avoid pulling on wiring or damaging connectors.
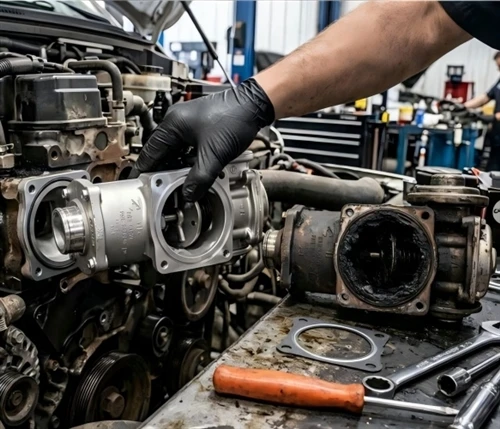
Step 5: Remove the Old EGR Valve
●Remove the mounting bolts or fasteners according to the service procedure.
●Carefully remove the old EGR valve and gasket.
●Inspect the mounting surface for carbon deposits, corrosion, damage or contamination.
Step 6: Inspect the EGR Passages and Related Components
Before installing the new valve, inspect the related EGR system.
Check for:
●Excessive carbon buildup
●Blocked EGR passages
●Restricted EGR cooler
●Damaged vacuum hoses
●Electrical wiring problems
●Damaged mounting surfaces
●Cleaning or repairing related components may be necessary before installing the replacement valve.
●Do not allow carbon deposits or cleaning debris to enter the intake system.
Step 7: Install the New EGR Valve
●Position the new gasket or sealing components as specified by the manufacturer.
●Install the replacement EGR valve carefully, ensuring correct alignment with the mounting surfaces and passages.
●Tighten the fasteners using the vehicle manufacturer's specified torque values and sequence.
●Do not guess tightening torque specifications.
Step 8: Reconnect Electrical or Vacuum Connections
●Reconnect all electrical connectors, vacuum hoses and other related components.
●Check that connections are secure and correctly positioned.
Step 9: Perform Diagnostic and Functional Checks
●Reconnect the battery according to the manufacturer's procedure.
●Use a suitable diagnostic scanner to:
●Read stored fault codes
●Clear codes when appropriate
●Check EGR commanded and actual position where supported
●Perform any required adaptation or relearn procedure
●Verify EGR system operation
●Some vehicles require a specific initialization or adaptation procedure after EGR valve replacement.
Step 10: Start the Engine and Verify Operation
Start the engine and allow it to operate under the conditions specified by the service procedure.
Check for:
●Abnormal engine operation
●Exhaust or intake leaks
●Coolant leaks where applicable
●Warning lights
●New diagnostic trouble codes
●Perform a road test only when safe and appropriate, then recheck the diagnostic system.
4. Common Mistakes to Avoid During EGR Valve Replacement
Incorrect replacement procedures can result in repeated faults or premature component failure.
Mistake 1: Replacing the EGR Valve Without Proper Diagnosis
A P0401 fault code may result from blocked EGR passages, a restricted cooler or sensor problems rather than a defective valve.
Mistake 2: Ignoring Carbon Deposits in the EGR System
Installing a new EGR valve without addressing significant system restrictions may not resolve the original problem.
Mistake 3: Using the Wrong Replacement Part
Incorrect OE cross-reference or vehicle application matching can lead to installation and performance problems.
Mistake 4: Reusing Damaged Gaskets
Damaged or unsuitable sealing components may cause exhaust or intake leakage.
Mistake 5: Ignoring Manufacturer Torque Specifications
Incorrect tightening can damage mounting surfaces, fasteners or sealing components.
Mistake 6: Skipping Functional Testing
A replacement should not be considered complete until the EGR system has been checked using the appropriate diagnostic procedure.
5. How to Choose a Reliable Aftermarket EGR Valve
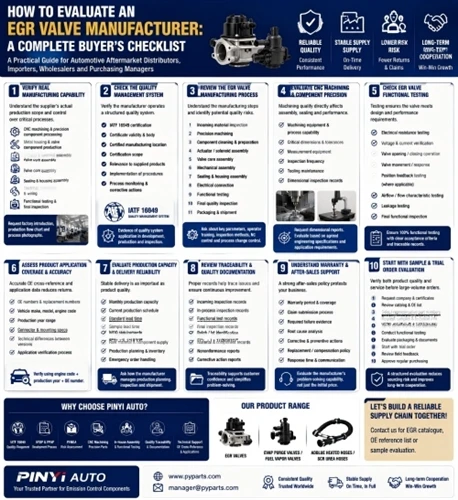
For repair workshops, importers and automotive aftermarket distributors, selecting the right EGR valve supplier is as important as the replacement procedure itself.
Consider the following factors:
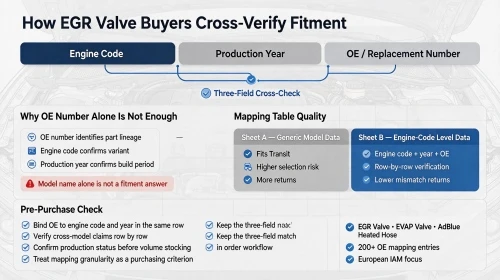
1. OE Cross-Reference Accuracy
Verify that the aftermarket EGR valve corresponds to the correct OE reference and vehicle application.
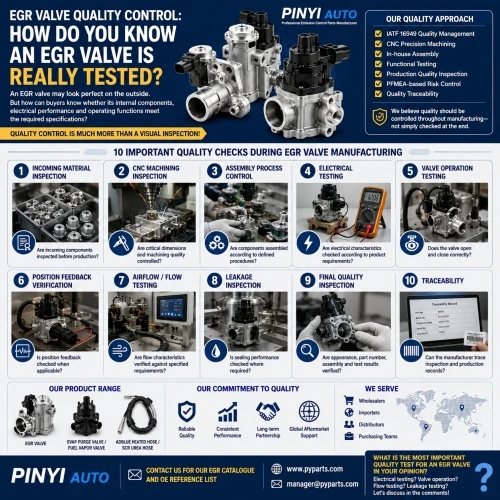
2. Manufacturing Quality
Evaluate machining accuracy, assembly control, material selection and product consistency.
3. Functional Performance Testing
Ask whether the supplier performs relevant functional tests, such as valve movement, position feedback, sealing and electrical performance where applicable.
4. Quality Management System
Check the supplier's quality management system and its manufacturing process controls.
5. Technical Support
A professional supplier should be able to provide application information, technical documentation and support during sample evaluation.
6. Warranty and Corrective Action
Understand the supplier's warranty policy, complaint handling and root cause analysis procedures.
6. PINYI AUTO – Aftermarket EGR Valve Manufacturer
PINYI AUTO is a Chinese automotive emissions components manufacturer specializing in aftermarket replacement products.
Our main product categories include:
●EGR Valves
●EVAP Purge Valves / Fuel Vapor Valves
●AdBlue Heated Hoses / SCR Urea Hoses
Our EGR valve manufacturing capabilities include:
●Precision machining
●Controlled assembly processes
●Functional performance testing
●Quality inspection
●Product development and application evaluation
Our quality management and product development processes incorporate:
●IATF 16949
●APQP
●PPAP
●PFMEA
●Process control and inspection
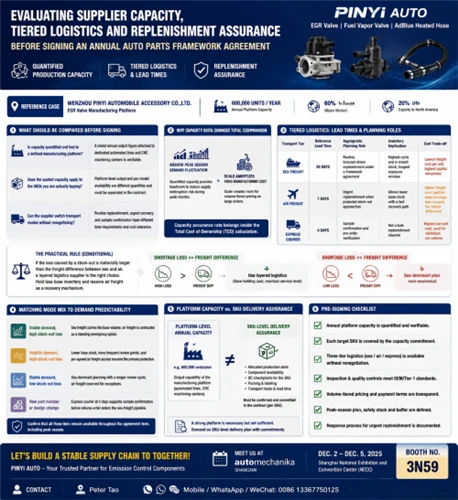
We support European automotive aftermarket distributors, importers, wholesalers and private-label brands seeking reliable product sourcing and development solutions.
Whether you are expanding your EGR product range or evaluating a new replacement application, PINYI AUTO welcomes discussions about OE cross-reference information, product specifications, samples and cooperation opportunities.
7. Frequently Asked Questions About EGR Valve Replacement
Q1: How long does it take to replace an EGR valve?
Replacement time depends on the vehicle model, engine layout, valve accessibility and required adaptation procedures. Some applications are relatively straightforward, while others require substantial disassembly.
Q2: Can I replace an EGR valve myself?
Some vehicles allow relatively accessible replacement, but others require specialist tools, diagnostic equipment and specific service procedures. Professional installation is recommended when the procedure or system design is unfamiliar.
Q3: Should I clean or replace an EGR valve?
Cleaning may help when contamination is the main issue and the valve remains mechanically and electrically functional. Replacement may be necessary when the actuator, sensor, valve mechanism or sealing function is defective.
Q4: Do I need to replace the EGR gasket?
A new gasket or specified sealing component should generally be used when required by the vehicle manufacturer's service instructions. Damaged or compressed seals should not be reused.
Q5: Does a new EGR valve need programming?
Some electronically controlled EGR systems require an adaptation, initialization or relearn procedure after replacement. Requirements vary by vehicle.
Q6: Will replacing the EGR valve fix P0401?
Not always. P0401 can be caused by restricted passages, a blocked EGR cooler, sensor problems or other system-related faults. Proper diagnosis is essential before replacement.
Q7: How do I select the correct aftermarket EGR valve?
Check OE cross-reference numbers, vehicle application, engine specifications, connector configuration, mounting dimensions and functional compatibility.
Conclusion
Correct EGR valve replacement involves more than removing an old component and installing a new one.
Proper diagnosis, application matching, installation procedures and post-installation testing are essential for reliable EGR system operation.
For automotive aftermarket distributors, choosing a supplier with controlled manufacturing processes, functional testing and technical support is equally important.
PINYI AUTO – Your Aftermarket Partner for EGR Valves, EVAP Purge Valves and AdBlue Heated Hoses.
Contact us to discuss EGR valve applications, product information and aftermarket cooperation.